2026-10-24 ·
Inspecting Chimney Crowns for Damage from Utah's Intense Sun and Wind
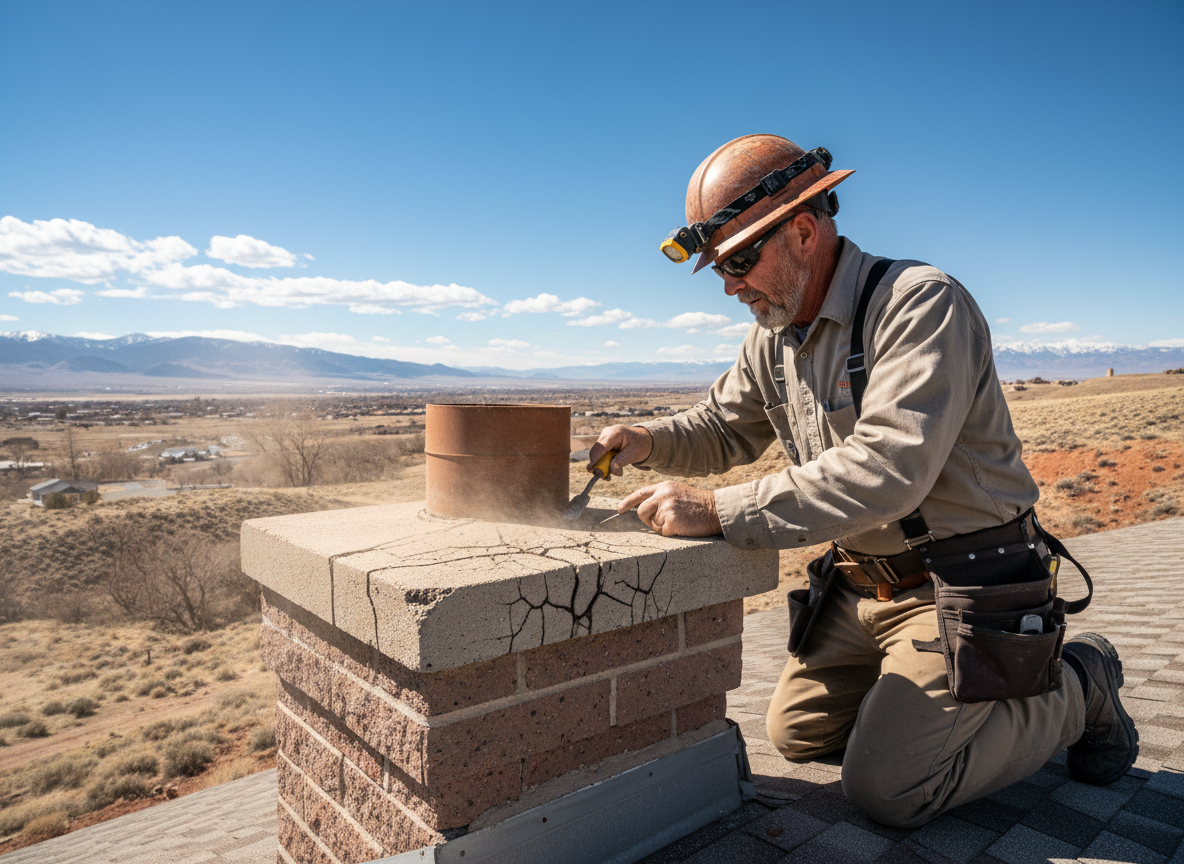
Chimney crowns in Riverton typically show visible cracking and surface erosion within 5–8 years due to the semi-arid climate's intense UV rays and wind-driven abrasion on masonry surfaces. Homes in neighborhoods like Riverton Meadows, Western Springs, and Harvest Park face repeated exposure because their chimneys sit above rooflines with little shade. The combination of summer highs above 90 degrees and winter lows that drop below freezing creates daily expansion and contraction that breaks down mortar and concrete caps faster than in milder regions. Residents in nearby Draper, South Jordan, and Herriman report similar patterns on older brick and stone stacks built before modern sealants became common.
How Local Climate Affects Crown Materials
The semi-arid conditions around Riverton City Park and the Old Dome Meeting Hall expose crowns to prolonged direct sunlight that dries out protective coatings and fades sealers within two to three seasons. Wind gusts common in Salt Lake County carry abrasive dust that scours the top surface, widening hairline cracks into gaps that allow moisture entry. Once water penetrates during rare but heavy rains, the cold nights cause ice expansion that lifts sections of the crown away from the flue. This cycle repeats each year and hits prefabricated and masonry crowns differently depending on the original mix of cement and aggregate used in the 1980s and 1990s housing stock.
Visible Signs of Sun and Wind Damage
Look for hairline cracks radiating from the flue opening or along the outer edge where the crown meets the chimney sides. Flaking concrete or loose aggregate on the crown surface indicates UV breakdown that has removed the protective layer. Check for missing mortar joints at the perimeter and any white efflorescence stains that show repeated wetting and drying. In Harvest Park homes, wind often erodes the north and west faces first, leaving uneven surfaces that collect debris. Compare the crown condition to the rest of the chimney stack to confirm the damage is isolated to sun and wind exposure rather than structural settling.
Step-by-Step Crown Inspection Process
Begin at ground level with binoculars to scan the crown from all four sides during daylight hours when shadows highlight surface irregularities. Climb to the roof only with proper fall protection and examine the crown for ponding water after rain or signs of previous repairs that have failed. Tap the surface lightly with a rubber mallet to detect hollow spots where the top layer has delaminated from the base. Measure any cracks wider than 1/8 inch and photograph them with a ruler for scale before calling a technician. Document the age of the home and any previous waterproofing attempts to help prioritize repairs.
Protecting Crowns Before Winter Arrives
Applying a breathable masonry sealer every 3–5 years reduces moisture absorption without trapping vapor inside the crown. Chimney crown repair addresses existing cracks before they allow water to reach the flue liner. Pairing this with chimney waterproofing helps extend service life in areas like Western Springs where wind exposure is highest. Homeowners planning ahead often review When to Schedule Chimney Repair Before Riverton's First Hard Freeze to coordinate inspections with seasonal temperature drops. Regular checks prevent small surface issues from requiring full crown replacement later.